
Guest Sewist: Josie Booth
PDF Sewing Pattern being used for this mod: Never Never Land Dress (NNLD)

Hi Everyone!
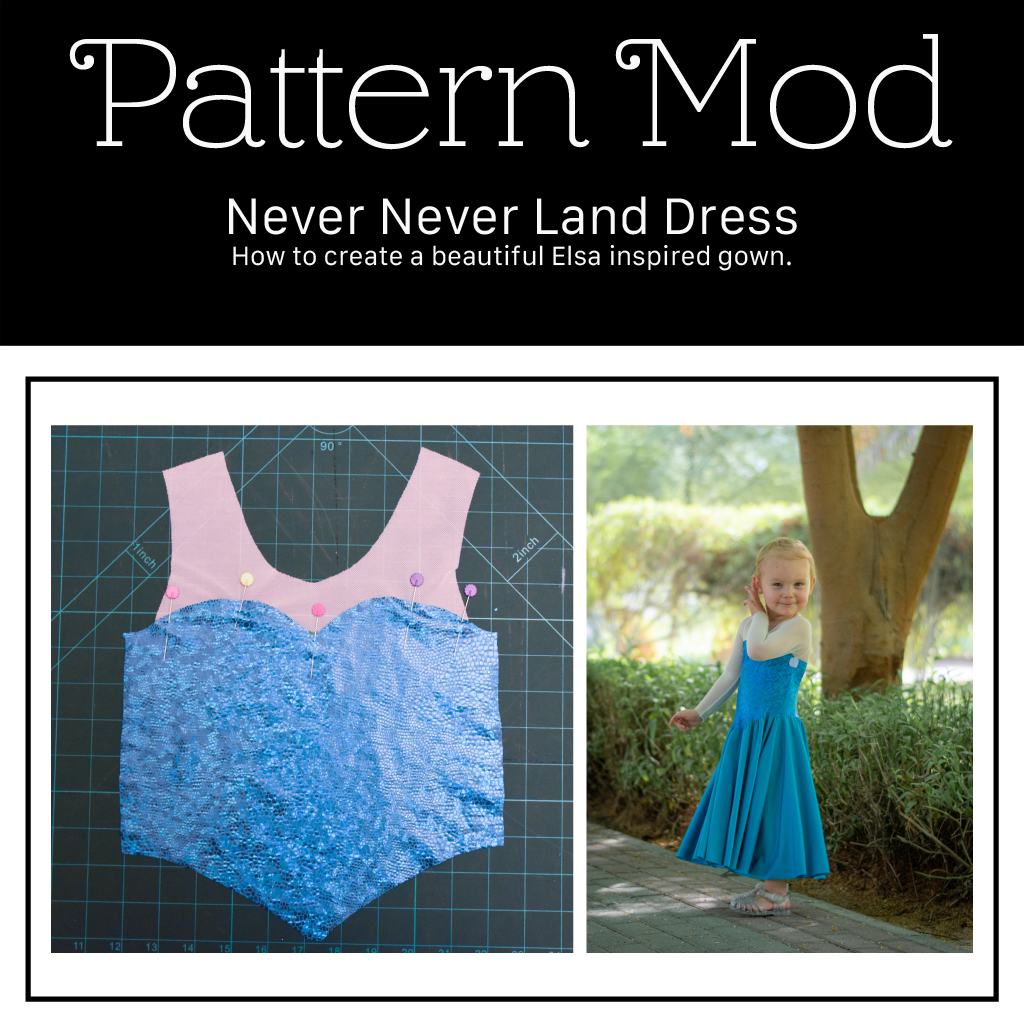
My name is Josie and I am a huge RCPC fan. One of my favorite patterns to use is the Never Never Land Dress (NNLD) as it is so versatile and makes a great base for princess dresses. About a year ago I made my daughter an ‘Elsa’ Ice Queen dress using the NNLD, and she wore it so many times she completely wore it out! After asking me daily for a new one, I finally found the perfect fabric and went for it. The best thing about sewing a ‘hacked’ dress for the second time is that you learn from the first time…..and this time I documented the steps. Here is a tutorial on how I made this dress that is perfect for dress up and play (especially because the cape is detachable), just in case your little wants one too!

Supplies:
Materials as mentioned in the NNLD tutorial
Additional fabric for the cape (I made the 3T size and used a yard of glitter soft tulle – it was quite wide width). I recommend using tulle or a material that you do not have to hem. The first time I made the dress I used Organza and it was a nightmare to hem, so while you can use this, I don’t recommend it)
Stretch mesh fabric for the top of the bodice
Velcro (2” of hook side, 2” of loop side)
The printed pattern for the bodice (I usually use a projector, and did for the skirt and sleeves still, but for altering the top it is much easier to do with the printed bodice)
Steps:
Step 1:
Take your bodice front pattern piece and mark where the 3/8” seam allowance is at the neckline. Then, draw a curved line from just above the bottom of the armscye to the center of the bodice. Make sure to leave enough room under your seam allowance line that you will have some of the mesh in between the curved bodice and neckline. Then, lay the back bodice piece next to the front bodice piece and mark a line across the back. Make sure the line starts at the same point above the armscye as your front bodice piece did.

Step 2:
Cut along the lines. I have numbered the bodice pieces for ease of reference on the next steps.

Step 3:
Take piece 4 and place on the fold of your fabric. Measure 3/8” from the top edge and mark (I used a frixion pen). Cut out the piece using the top line you just drew.

Step 4:
Take piece 3 and place on the fold of your mesh fabric. Measure 3/8” from the bottom and mark (I used a frixion pen). Cut out the piece using the top line you just drew.

Step 5:
Cut out piece 2 on the fold (do not add 3/8” anywhere).

Step 6:
Place piece 1 on the fold of your mesh fabric. Cut as the photos show below. You do not need to add a ton of extra at the bottom, but a few inches makes the next steps easier. Mark the center point and edges of the pattern piece on the piece you just cut.


Step 7:
Place pieces 3 and 4 right sides together. Clip and then stitch using a 3/8” seam allowance with a stretch stitch or serge.

Step 8:
Place piece 2 on top of piece 1, matching the lowest point of the v and the sides with the marks you made in step 6. Pin in place.

Step 9:
Using a narrow zigzag stitch, top stitch piece 2 on top of piece 1. I used a width of 2.5mm and length of 1.4mm. Go slow and lift up your presser foot every now and then to make sure you aren’t dragging your fabric.

Step 10:
Cut away the excess mesh fabric from piece 1, close to the seam.

Step 11:
You now have a full bodice front and bodice back piece. Continue sewing the dress as the NNLD dress tutorial states. I used fold over elastic for the neckline, but you can also use the regular elastic as mentioned in the NNLD pattern tutorial.
I also lengthened the skirt to be floor length on my daughter.

Step 12 – Making the Cape
Gather your cape fabric at the top of the fabric to the width of your finished dress bodice. Surge/zigzag the top edge to finish and secure the gathers (We will add elastic in the next steps to help secure as well).

Step 13:
Cut four pieces (2 sets) of Velcro approximately 1” x 1” making sure to round the corners.

Step 14:
Attach/sew the loop (soft) side to the bodice sides, right under the arms. Attached the hook (hard) side to the ends of the cape.

Step 15:
Measure the width of your back bodice piece and then subtract 3”. Cut a piece of elastic equal to this measurement. Attach the elastic to the cape between the velcro, stretching the elastic to fit. I used 3/8” elastic and a wide, long zigzag stitch. This step is to help secure your gathers and allow some stretch in the cape. I originally didn’t do this and my daughter immediately popped the stitches in the gathers, so I highly recommend this step. It helps make it more robust for play.

That’s it…you’re done! You have a fun ‘Elsa’ Ice Queen Dress for your little! I can’t wait to see your make!