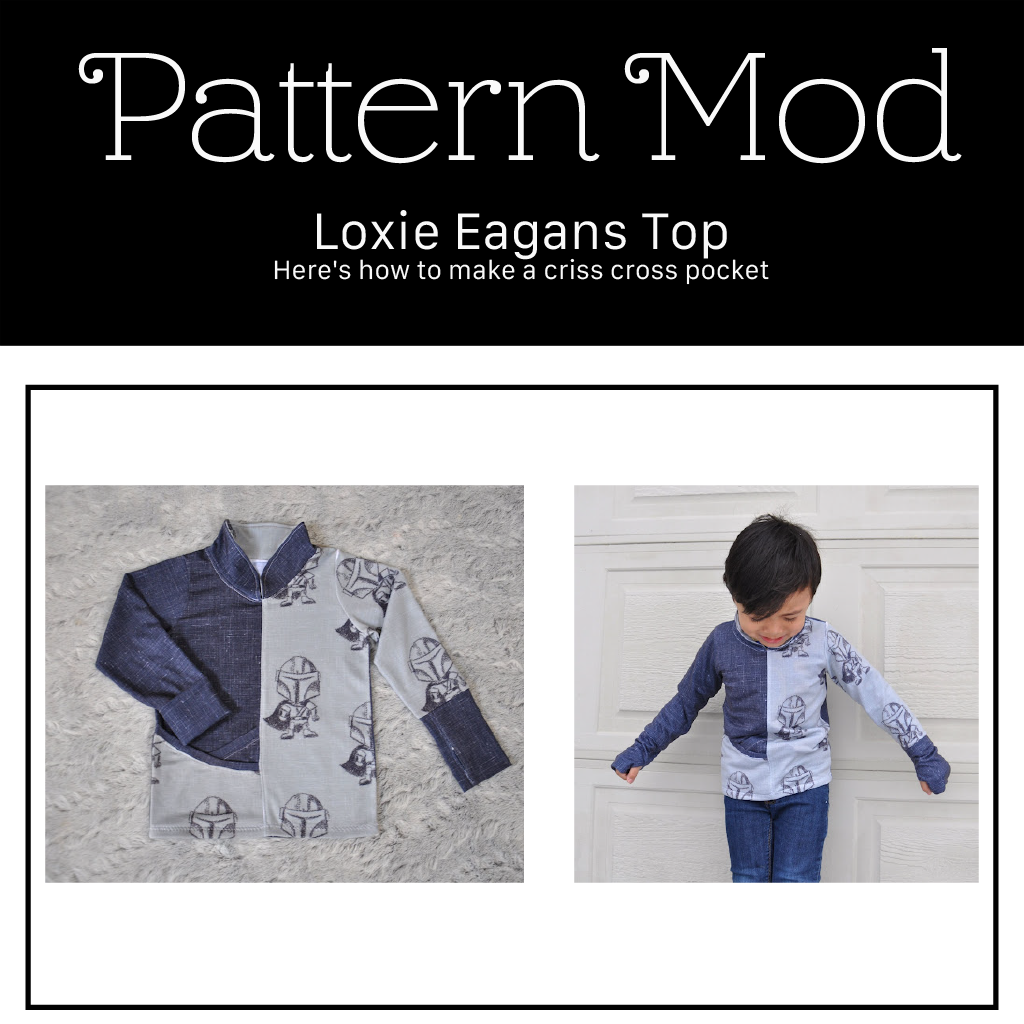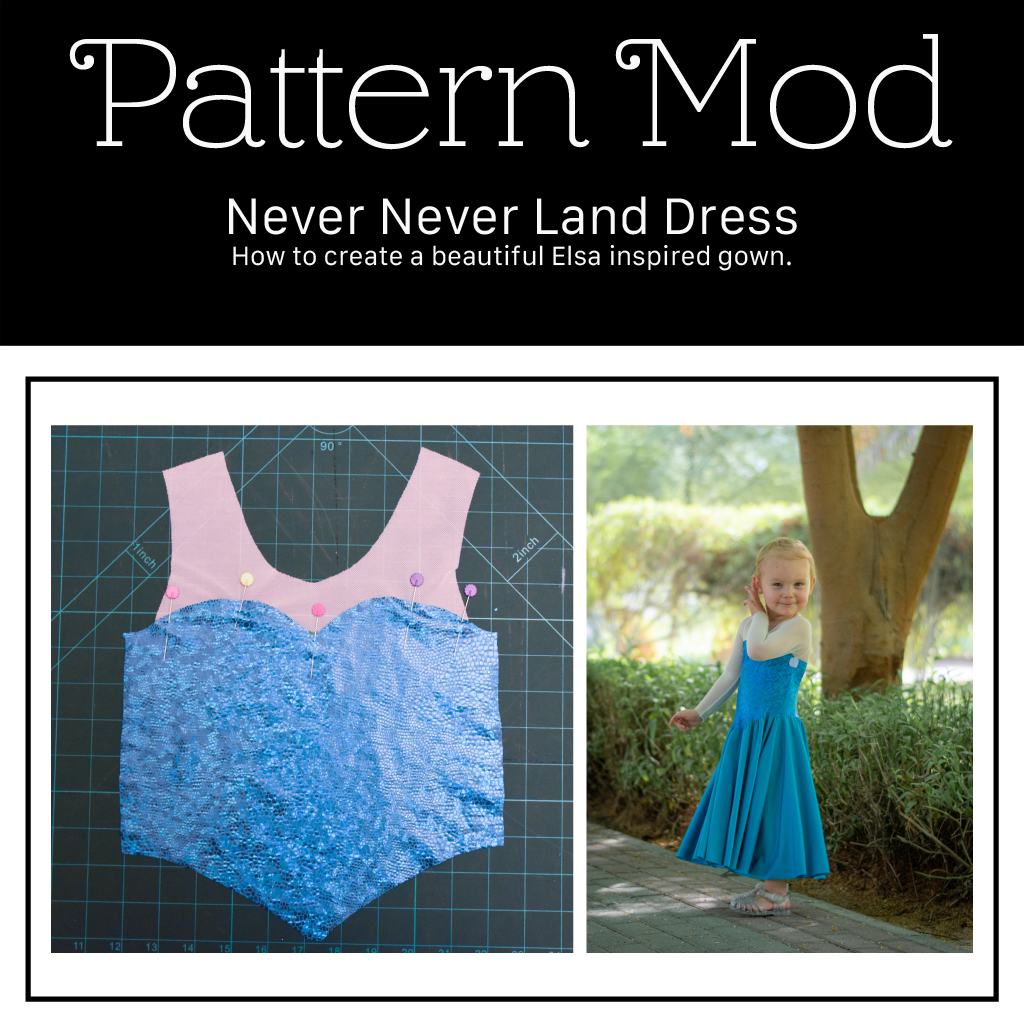

this blog contains affiliate links
Guest Sewist: Jessica
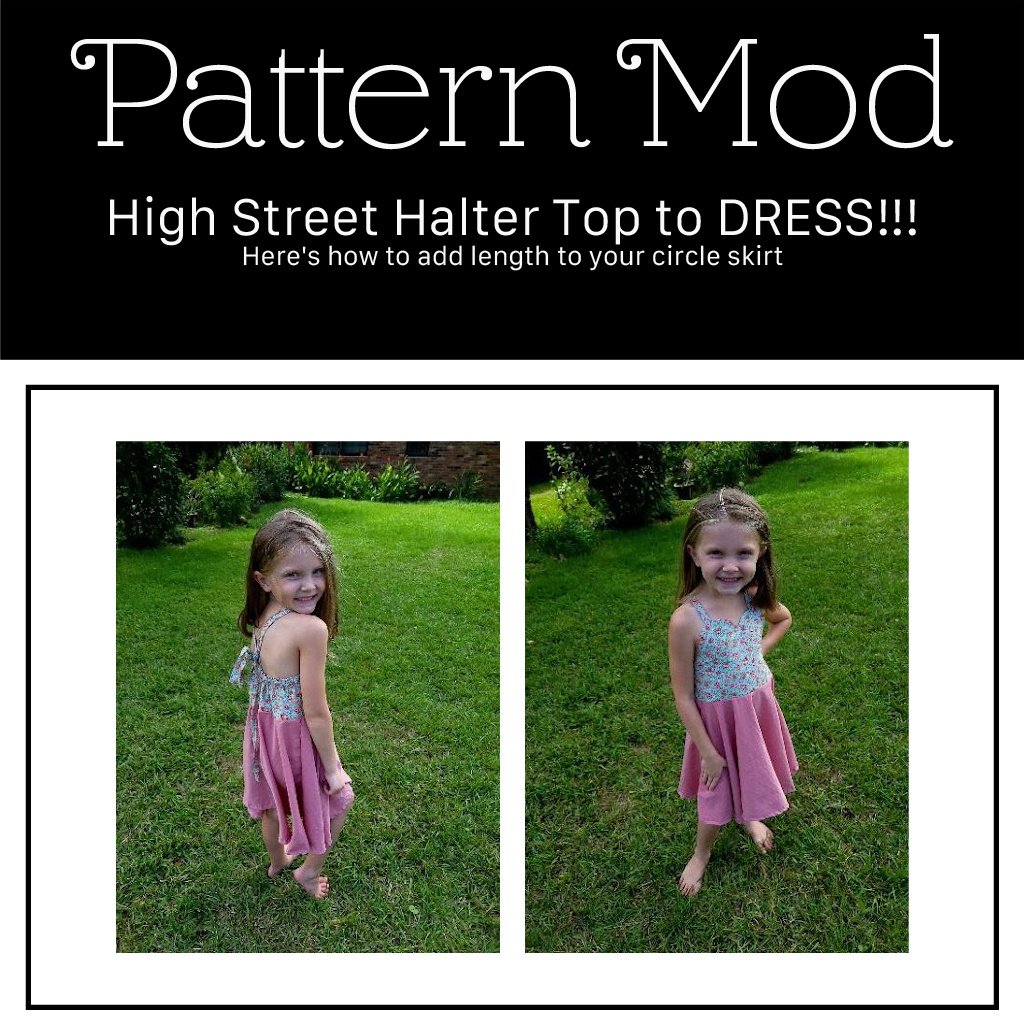
Pattern: High Street Halter Top
Hey beautiful Rain City Rainsters!
If you’re like me you’ve been battling unbearable heat this summer. When it is well over 100 my girls don’t want to wear anything but Halter tops and dresses, so you know what that means…. NEW DRESSES! Today we are going to take the High Street Halter and modify it into a beautiful summer dress. It’s super simple and you can get it done in an afternoon or less. So, grab your pattern from the link below, fabric markers, scissors, sewing machine, ruler and let’s have some sewing fun.

High Street Halter: https://raincitypatterncompany.com/collections/kids-tops/products/child-halter-top-pdf-sewing-pattern?aff=339
Print out your pattern pieces based on your size indicated on the chart, I went with a 6. The modifications that we are going to make are to the skirt and to the straps, so cut out the rest of the pattern as usual. The straps are the same width x the length of your fabric ( mine ended up being 42).
Skirt
- Measure your kid from the bottom of the bodice to where you want the skirt to end. I wanted it to end about knee length, so for my daughter it was 16 inches.
- Measure from top of pattern piece straight down side the length of skirt (16 inches for me), do the same in the middle and on the other side
- Then draw an arc connecting your marks making a partial circle
- Do the same for the front and back skirt pieces

Construction
- In order to accommodate the added weight of the skirt without giving too much strain on the neck straps, I have lengthened the neck straps and added a loop for them to attach to, which is located in the back waistband
- Cut a 2inch by 4-inch piece for the back strap loop and sew it like the straps

Find the center of the main back bodice piece, folding the back strap loop into a loop, place raw edges together and baste it in place
Follow directions as stated in instructions to complete the construction of the back bodice
The rest of the construction can be done by following the expertly written directions that came with the pattern you downloaded.

Now you’re done! Don’t forget to share your beautiful makes in the Rain City Pattern Company Facebook Group! I can’t wait to see what you’ve made! You can see other awesome Rain City makes on my Instagram@sew.happy.to.for.u