


this blog contains affiliate links
 Guest Sewist: Carol
PDF Sewing Patterns being used for this Modification (Mod):
Hoodie or Not
Hello I am Carol , I have been a hobby sewist for over 60 years. Being retired I now have plenty of time for my hobby and it is great learning new things and pushing my boundaries. Usually my makes are children’s clothes for my 4 grandchildren, but I am now also embracing making my own clothes once again.
I am based in Salisbury in the south of England. Very close to Stonehenge and not far from the lovely south coast beaches. Our weather is generally mild but additional layers are essential wear.
My grandchildren love hoodies, they are always on my list of makes to do.
Which leads me to the Hoodie Sport, this pattern is a dream to make, simple yet looks so good with the contrast yoke and sleeve tops. I particularly love that it enables me to use up small pieces of precious fabrics. I am a firm believer in trying to use every bit of the fabric I buy.
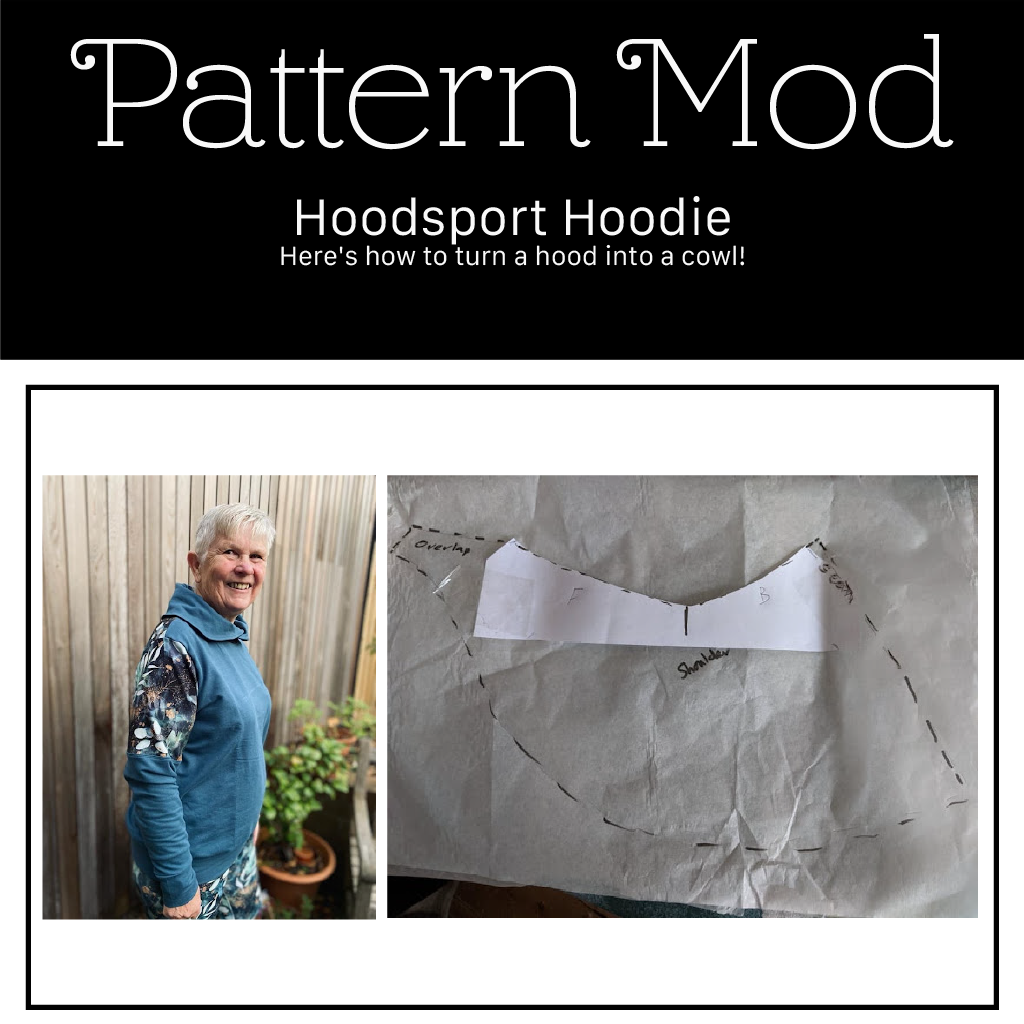
But being of an age where hoodies are not the best of looks I was in a dilemma when the adult version of the pattern was launched. I love the body shape but didn’t want a hood, so I decided to have a go at changing the neckline.
I wasn’t sure which neck style to go for- a cowl, turtle neck or shawl collar…. But my mind was made up for me after I had cut out my main sweater pieces as I had no contrast fabric left and only a skinny piece of main- so shawl collar it had to be.
What is needed?
The Rain City Hoodsport Hoodie pattern
[https://rain-city-pattern-company.myshopify.com?aff=336]
Your fabric
Tracing Paper
A marker pen
Ruler
Step one
Join the back yoke and lower back pieces and attach to the front at the shoulders as in the pattern.
I then folded my garment in half centre front and backs together and placed on a piece of paper and drew the neckline shape roughly.

Step Two
I marked centre front, shoulder and centre back on my paper. I then took this piece of paper and placed on tracing paper.

Step Three
Now came the leap of imagination. I increased the length at the front to make an overlap.
I extended out the back slightly to allow for a seam. I imagined quite a full collar when on so I went for 6 inches for the length of the centre back seam. I then drew a curve joining my front to the back.

Step Four
I cut out my pattern piece and used this to cut out 2 mirrored pairs- one as inner and one as the outer collar. I had enough fabric left for one pair in the main fabric but had to do the other pair in a plain contrast fabric.
Step Five
I joined the centre back seam for both the inner and outer collars. Next I opened out and pressed each piece, and then put the two right sides together and clipped and stitched together along the outer edges. I then turned, pressed and top stitched


Step Five
I clipped my collar to the neck, overlapping the two pieces at the centre front.

The ends needed to be pulled up out of the way.
Step Six
I stitched the collar in place. I used a sewing machine with a stretch stitch as I felt it gave me the flexibility to go back and change things if all didn’t sit well.
Once sewn, it was ready to try on to check if the collar was ok…. which it was! I then went back and serged my edges, and top stitched around the neck, before going on to complete the sweater.
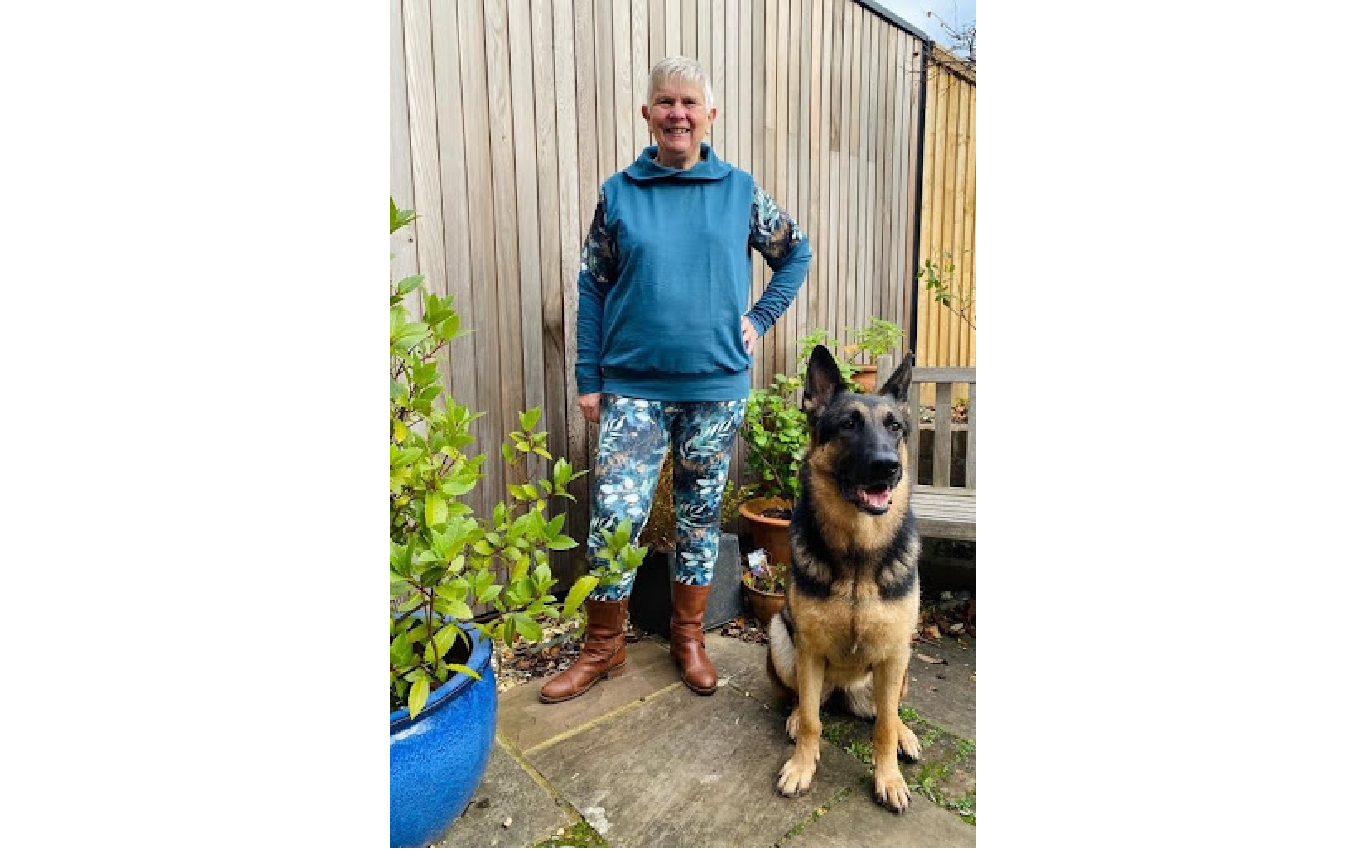
Was it a success?
I think so. It all sits well on the garment and I now have a casual top that suits me better.
Would I do anything differently next time?
Yes, I would reduce the overlap at the front a little and probably go for a depth of 5 not 6 inch T centre back. I think I would also interface the collar to make it a little less wavy at the edges.
Am I pleased?
Oh yes- now to get some more fabric and try it with a cowl neckline!


1 comment
It looks great – really adds interest. Not easy to get right : )