


this blog contains affiliate links
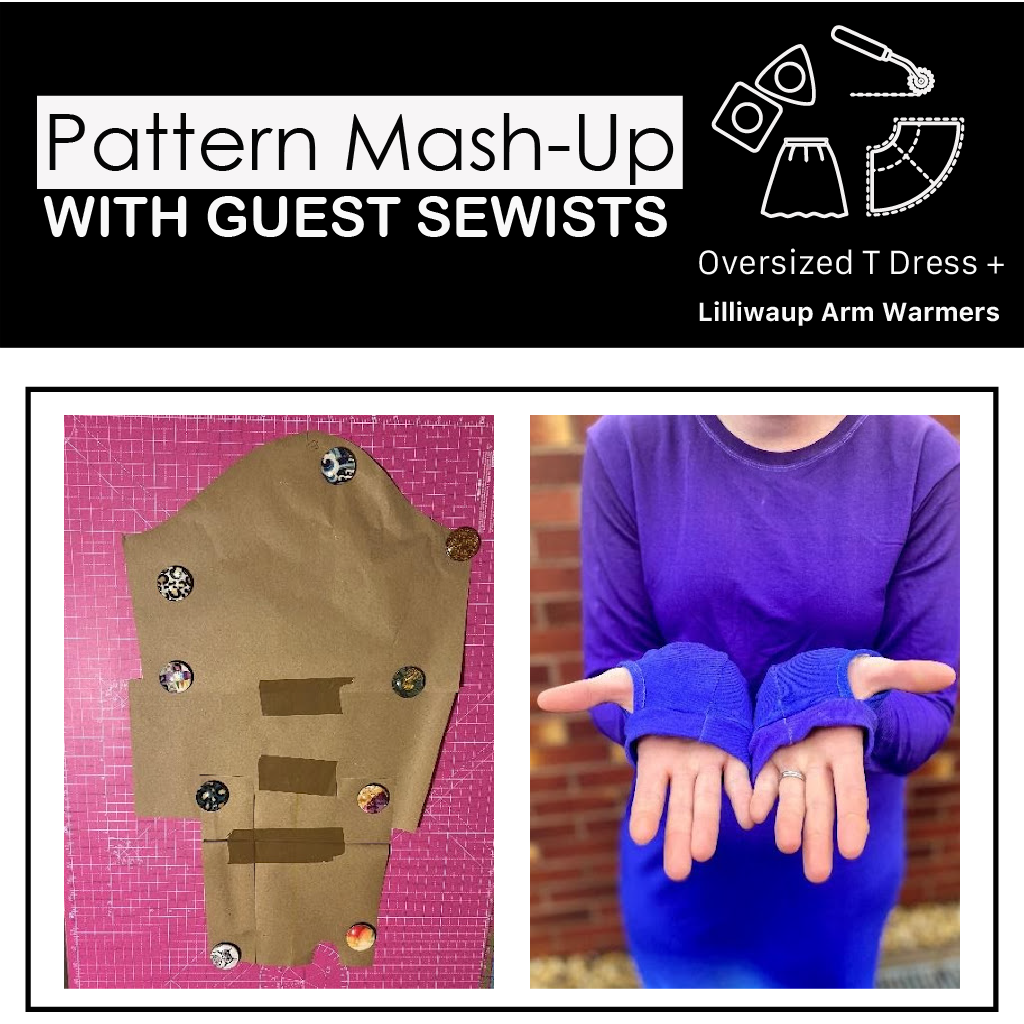
Guest Sewist: Rachel (@sew_myself_happy)
PDF Sewing Patterns being used for this Mash-Up:

Hi,
I’m Rachel – find my sewing makes over at Sew_Myself_Happy on Instagram. When I’m not sewing, I’m usually battling toddler tantrums, working as a mental health occupational therapist, or trying to convince myself to go for a run. I emigrated to the UK about 2.5 years ago from tropical Queensland, Australia and am definitely suited for the heat. I love thumbholes on everything as I constantly have cold hands and mum brain means I ALWAYS forget my gloves! I thought I would mash the Oversized Tee Dress with the Lilliwaup Arm Warmers for a nice slouchy and comfy (but warm!) casual dress. I even ended up using Blair’s blog to make a tee version for a running top.
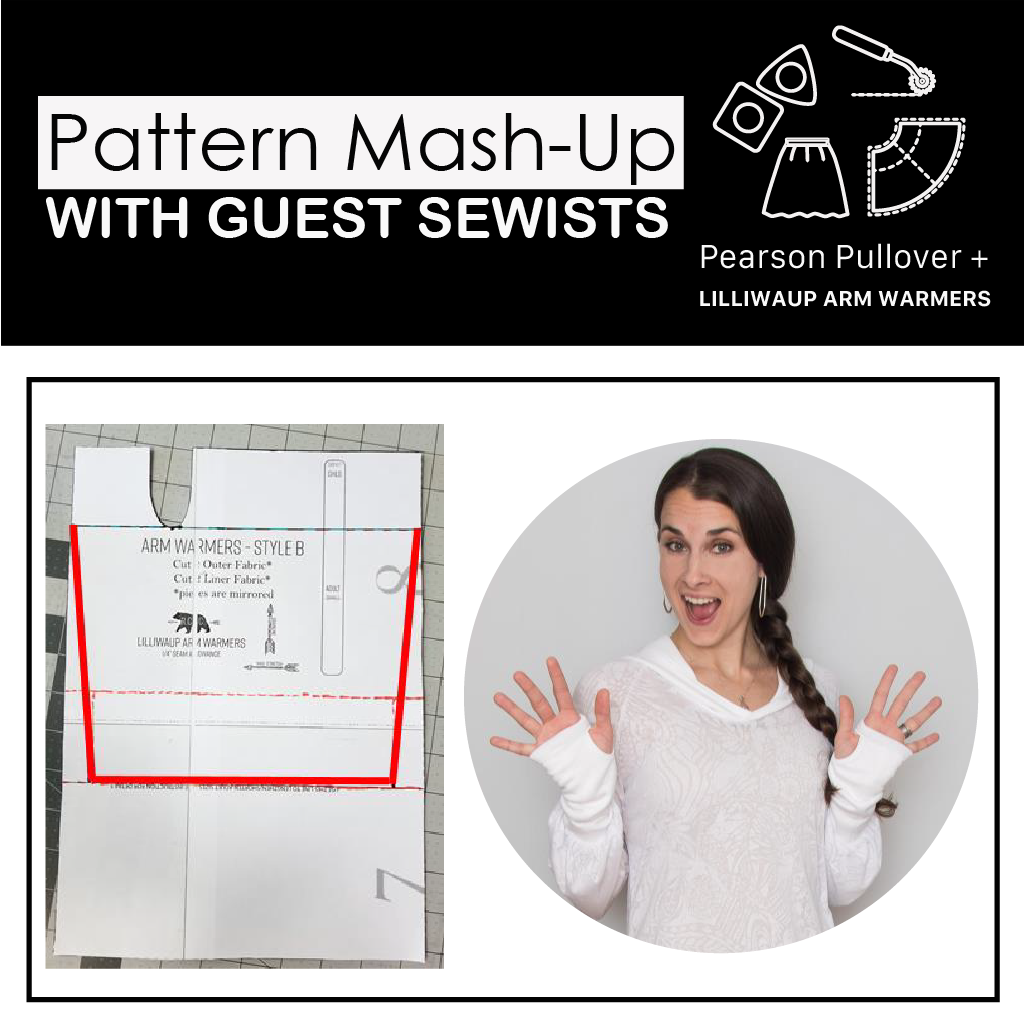
My measurements are: upper bust – 34”, bust – 35.3”, waist – 30”, hip – 29.5”, forearm girth 9.5” and hand girth 6.25”. I also measured the length of my sleeve (from my shoulder joint to the bottom of my thumb) which was 27”. Handy tip is to tape one end of the tape measure to your shoulder joint if you don’t have someone handy to help measure! I used S1c for the oversized tee dress and medium for the lilliwaup arm warmers. I didn’t grade for my waist or hips due to the ease of the oversized tee dress pattern. I also used the unlined version of the lilliwaup arm warmer. I used my projector for the pattern – I traced my oversized tee dress sleeve piece and lilliwaup arm warmer piece onto some brown paper so I could create my new sleeve piece. I projected the rest of the pieces directly onto my fabric (dress front/back and neckband, and lilliwaup hand band.)
I adjusted the lilliwaup arm warmer using the pattern instructions provided – shortened by 1” and reduced the hand girth by 0.5”. I also shortened the hand band by 0.5”. I then laid my pattern pieces out on my cutting mat so the that top of the oversized tee shirt dress was at 0, and then bottom of the arm warmer piece at 27.5” (to allow for seam allowances). You want the thumb hole side of the arm warmer to match the front side of the sleeve head. I then placed some more paper to fill the gap between the two patterns. I drew a line from the underarm points to the corner of the top of the arm warmer (you will lose a little fullness of the oversized tee dress sleeve) and smoothed the edges. This is the new sleeve piece.

The only other deviation from the instructions I made was to sew the thumbhole binding as more of a traditional binding – firstly I sewed the binding long edge and thumbhole curve together RST, then folded the binding over the seam to enclose it, then topstitching on the right side of the binding close to the seam fold. I used my coverstitch but you could use a twin needle or stretch stitch on a regular sewing machine (my favourite stretch stitch for topstitching is a long and narrow zig zag stitch but play around on some scraps for a stitch that suits you best! You could even get away with a long straight stitch as there isn’t much stretch needed on that seam).

I then treated the piece as the regular sleeve piece and sewed up the oversized tee dress as per the pattern instructions. I added the hand band at the end as per the lilliwaup pattern instructions.
I made my midi dress using 2x1.5m bamboo French terry panels (and had some large scrap pieces left over). I made my running top using 1.5m of bamboo lycra.
I hope you give a go adding thumb holes to all your dresses and tops and reveal in the warmness! I know I will 😊
Happy sewing,
Rachel


1 comment
Nice mashup! I am going to have to try it.