
this blog contains affiliate links
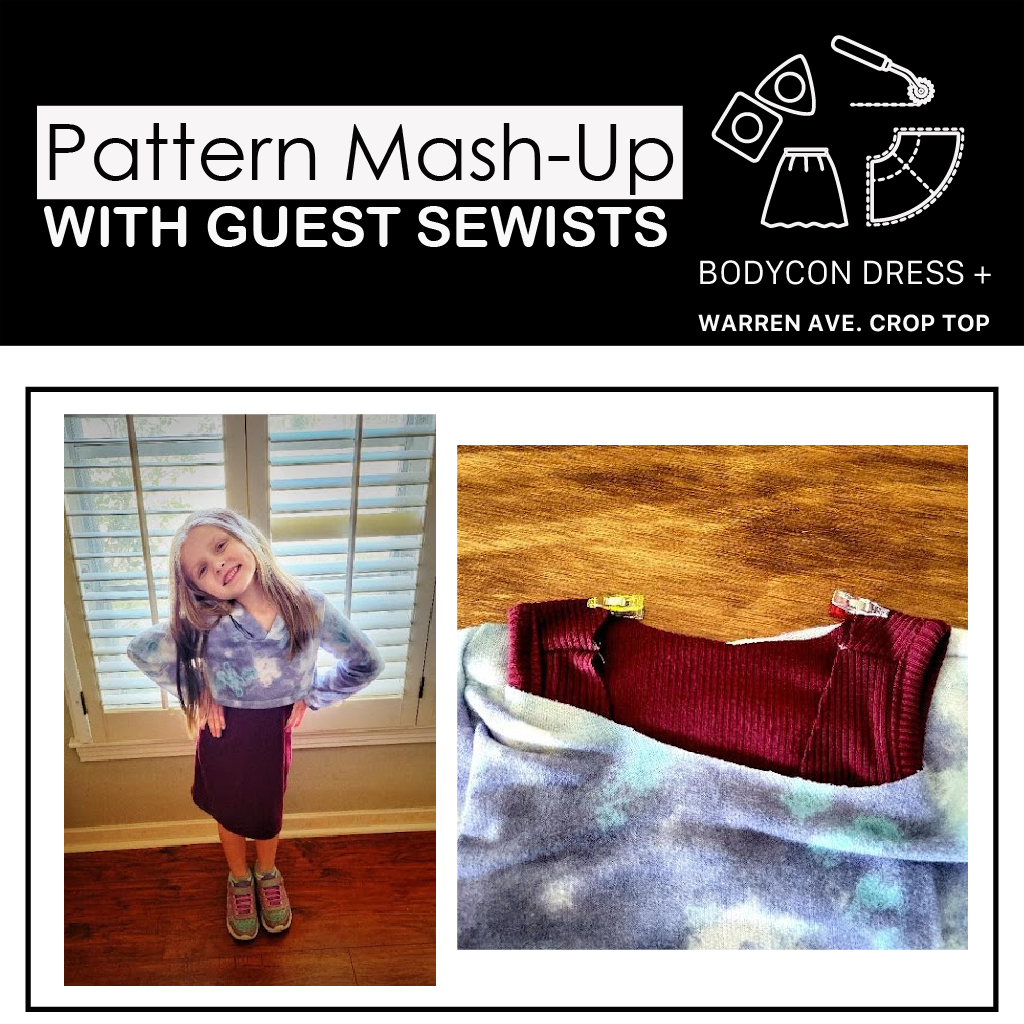
Guest Sewist: Jessica
PDF Sewing Patterns being used for this Mash-Up:
Hey everyone! I am so excited to be sewing with ya’ll today. My name is Jessica. I am a stay-at-home Mom to 3 rapidly growing girls. My days are mostly filled with homeschooling, but I absolutely love sewing up clothes for my girls and baking anything sweet.

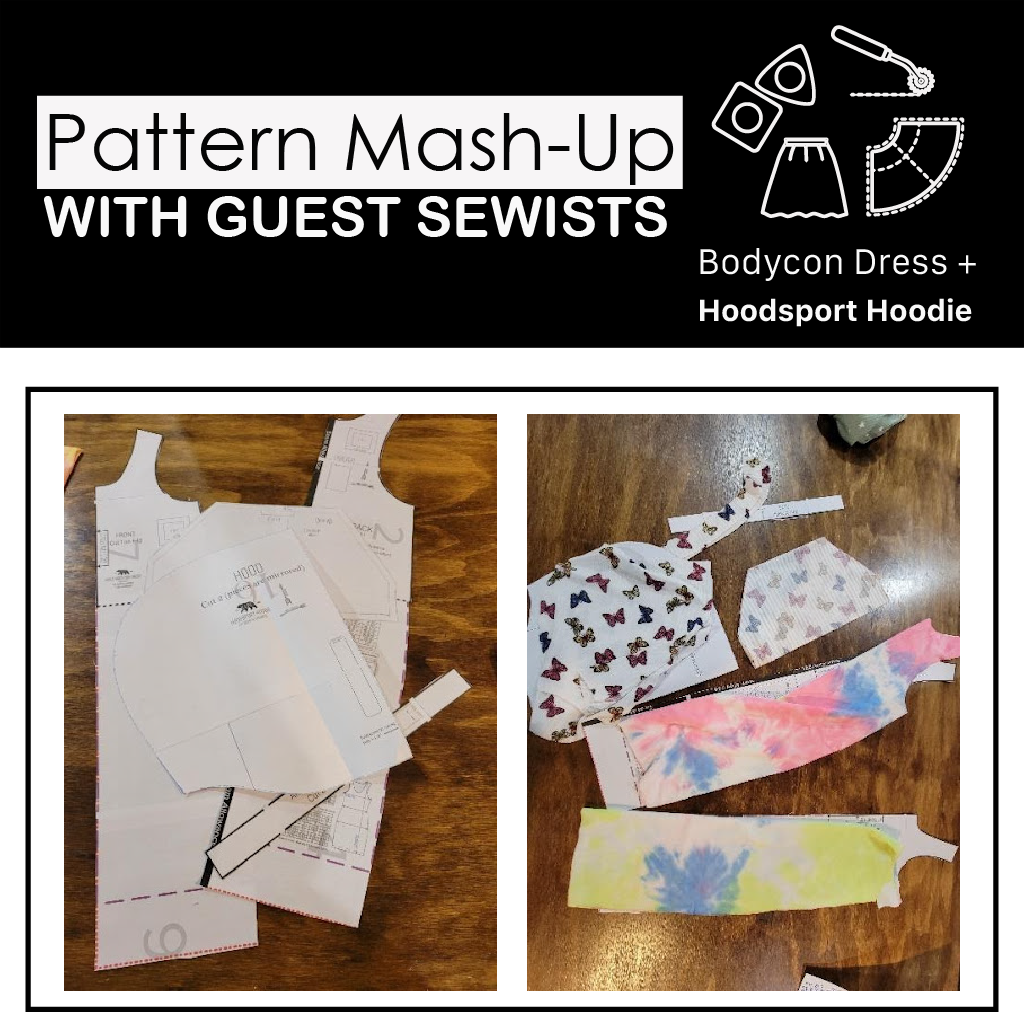
Today we are going to take the Kids Bodycon Dress pattern and the Kids Hoodsport Hoodie pattern and make a cool new mashup version of them. So, if you don’t already have these amazing patterns you can cruise on over to the Rain City Pattern Company’s website via my affiliate links and snatch them up.
Kids Bodycon link: https://raincitypatterncompany.com/collections/pdf-sewing-pattern-dresses-skirts/products/kid-bodycon-dress-child-size-4-14-beginner-level-sewing-pattern?aff=339
Kids Hoodsport Hoodie link: https://raincitypatterncompany.com/collections/kids-tops/products/hoodsport-hoodie-pdf-sewing-pattern-infant-to-child-sizes-6m-14?aff=339
Once you’ve acquired your patterns, measure your child and determine your size needed. We are going to put the hood and pocket from the Hoodsport Hoodie on the Bodycon dress.
How cute is that!? Right?!
Follow the directions in the instructions to printout the pages needed and assemble your pattern for your Bodycon Dress grading sizes if needed.
Pattern pieces needed:
Bodycon: dress front, dress back, arm bindings
Hoodsport Hoodie: pocket, hood
Resizing the pocket: Measurement
The First thing we have to do is to resize the pocket a little bit.
1. Place the pocket on the waist-line of the front dress pattern piece. Mark the bottom of where the pocket sits on the pattern with a pencil and remove the pocket from the pattern.
Find the pencil mark you made and measure that distance across (mine was 6 ¾). Now multiply that number by 2 because remember the pattern is on the fold so it is only half of the distance. That number is your new bottom length for your pocket (mine was 13 ½).

3. Draw out your new pocket on a new sheet of paper and cut it out.
* The seam allowance is already included in the pattern pieces so you don’t have to worry about adding it to the new pocket piece.
Tada! You did it! Now let’s get to sewing!
Cut out your coordinating fabrics. You can do as much color blocking as you want. Follow the Bodycon tutorial to sew the shoulder seams together and the Hoodsport Hoodie instructions for the pocket construction.

Pocket placement:
Now in order to determine correct placement of the pocket there are a few different ways to go about it.
A. You can measure your kidB. Measure the placement of the pocket on the Hoodsport Hoodie
C. Measure the distance from the top of the strap to the waist on the front pattern piece of the dress.
*I tried all of them and got the same measurement.
I used method C.
- I measured from the strap down to the waist on the front dress pattern piece (I got 10.5).
- Now remember if you use this method that this isn’t the actual top of the shoulder so I then measured from the top of the shoulder to the seam (I got roughly 1inch) and added that amount to my original number (10.5). That number is the distance down from the top of the shoulder the top of the pocket should be placed. Mine was 11.5.
- Mark that spot with a pin.

Follow the instructions for the Hoodie for placing the pocket in the center and pin in place.
* The bottom of the pocket must be turned under the seam allowance and pinned. *
Follow the Hoodie instructions for topstitching the pocket just continue the topstitching across the bottom of the pocket as well
Follow instructions for Bodycon to sew up the sides, place the arm bands and hem the dress. Follow the instructions for the Hoodsport Hoodie to construct the hood and place the hood on the dress.

You are done! You rocked it! Now stand back and look at the beautiful thing you just created. You should be proud. I am proud of you! Okay time to go get the adult versions and make Mommy and me dresses!
Adult bodycon link: https://raincitypatterncompany.com/collections/adult-pdf-sewing-patterns/products/adult-bodycon-dress-adult-size-s0c-l1c-beginner-level-sewing-pattern?aff=339
Adult Hoodsport Hoodie link: https://raincitypatterncompany.com/collections/adult-pdf-sewing-patterns/products/pdf-sewing-pattern-adult-hoodie?aff=339