this blog contains affiliate links
Guest Sewist: Connie (@alien.sewist)

I love thumb cuffs. Like, LOVE THEM. What I don’t love though, is when they’re too short and snug and pull against my hand. Slouchy, cozy thumb cuffs don’t seem to be a thing for tops anywhere on Planet Earth, but that’s the beauty of knowing how to sew, am I right?
First, let’s talk a bit about the two patterns we’re mashing here: The Pearson Pullover and The Lilliwaup Arm Warmers. If you are a fan of Rain City, you’re probably well aware of the Pearson Pullover. You know... that comfy top with options for a hood or neckband, and standard or elastic waist and arm bands? The Lilliwaup Arm Warmers, however, are SUPER underrated, in my opinion. I had been sewing Rain City patterns for quite a while before I even discovered they existed. Given my previously-mentioned love of thumb cuffs, I had to give them a try, and I was NOT disappointed. Plus, the size range is HUGE from baby through adult, so how can you go wrong?


Ok, so back to mashing patterns. After sewing both of these up separately, I quickly realized that a comfy pullover with slouchy thumb cuffs was a glorious combo that was missing from my life. I am happy to say, this is no longer a problem. If you have come this far and decided you need one too, read on and LET’S DO THIS!
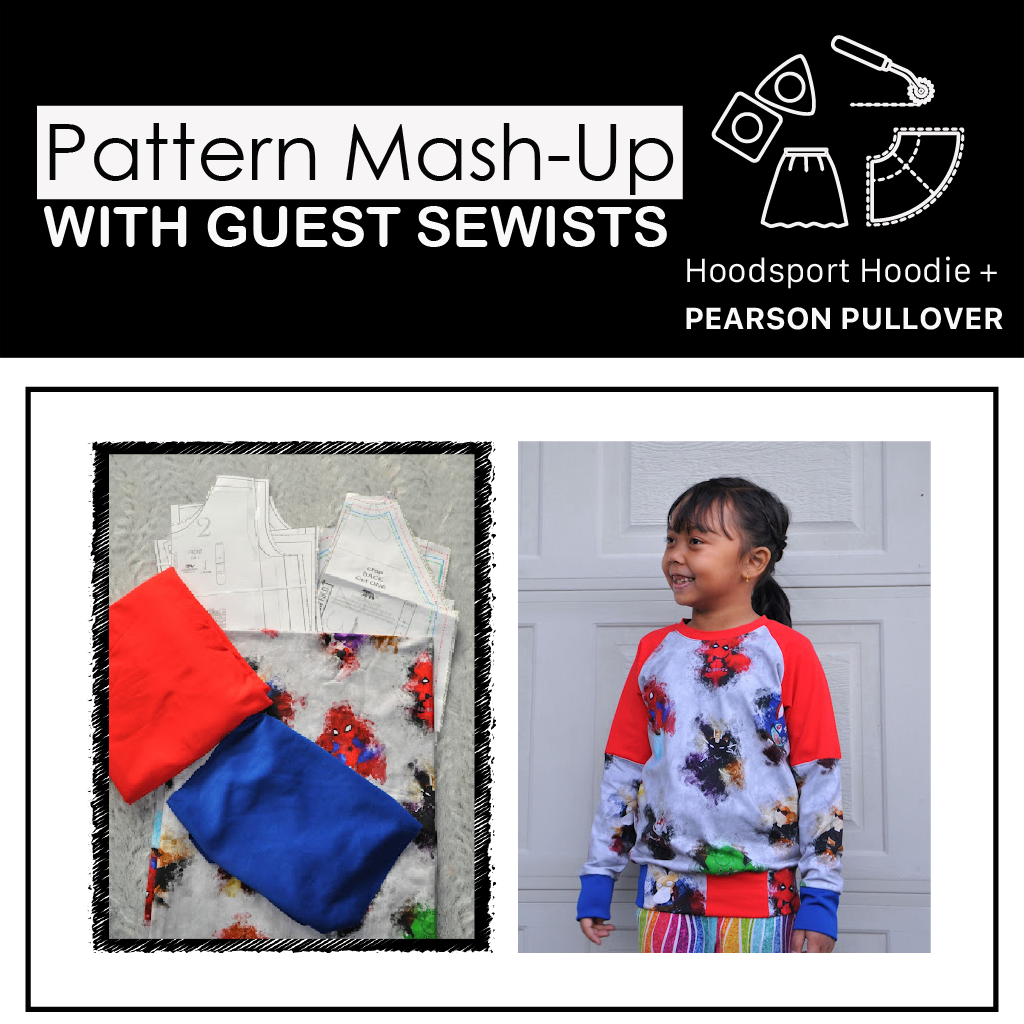
Both patterns have a few options included with them. The only thing that’s really mandatory here is to use the Pearson pullover option for wrist cuffs, not wrist elastic. The wrist is where the magic will happen. The neck and waist options are totally up to you, but as you can see, I chose a standard waistband over elastic, and a hood over the standard neckband.
For the Lilliwaup Arm Warmers, I would recommend working with Style B, which is the lined option. This will give your thumb cuffs two layers of structure, similar to almost any traditional, folded wrist cuff you would find out in the wild.
Now let’s take some measurements. Beyond what is required in the Lilliwaup and Pearson patterns to determine your proper sizes, the only additional measurement you’ll need is from your thumb down to your wrist bone, where the top of a traditional cuff would normally sit. For extra slouchy thumb cuffs like mine, I measured from the point where my thumb meets my hand, down to my wrist bone, which was about 3.75” on me. After adding the top and bottom seam allowances in (0.25” + 0.25” = 0.5”), my magic number for modifying my arm warmer pattern is 4.25”. Remember that for the next steps!

For less slouchy thumb cuffs, feel free to measure from the bottom knuckle of your thumb to your wrist bone instead, and you can probably also skip adding in the seam allowances since there’s some good wiggle room already built into the sleeve of the Pearson pattern.

Now that we have our measurements, let’s modify the arm warmer pattern. I normally work with a projector, but I found it easier to make my modifications with print patterns, especially since the parts that require changes are small and easy to print.
The following pieces will be needed to create your thumb cuffs. Be sure to print the sizes according to your measurements per both pattern instructions.
- The Pearson Pullover wristband piece
- The Lilliwaup main arm warmer piece – Style B
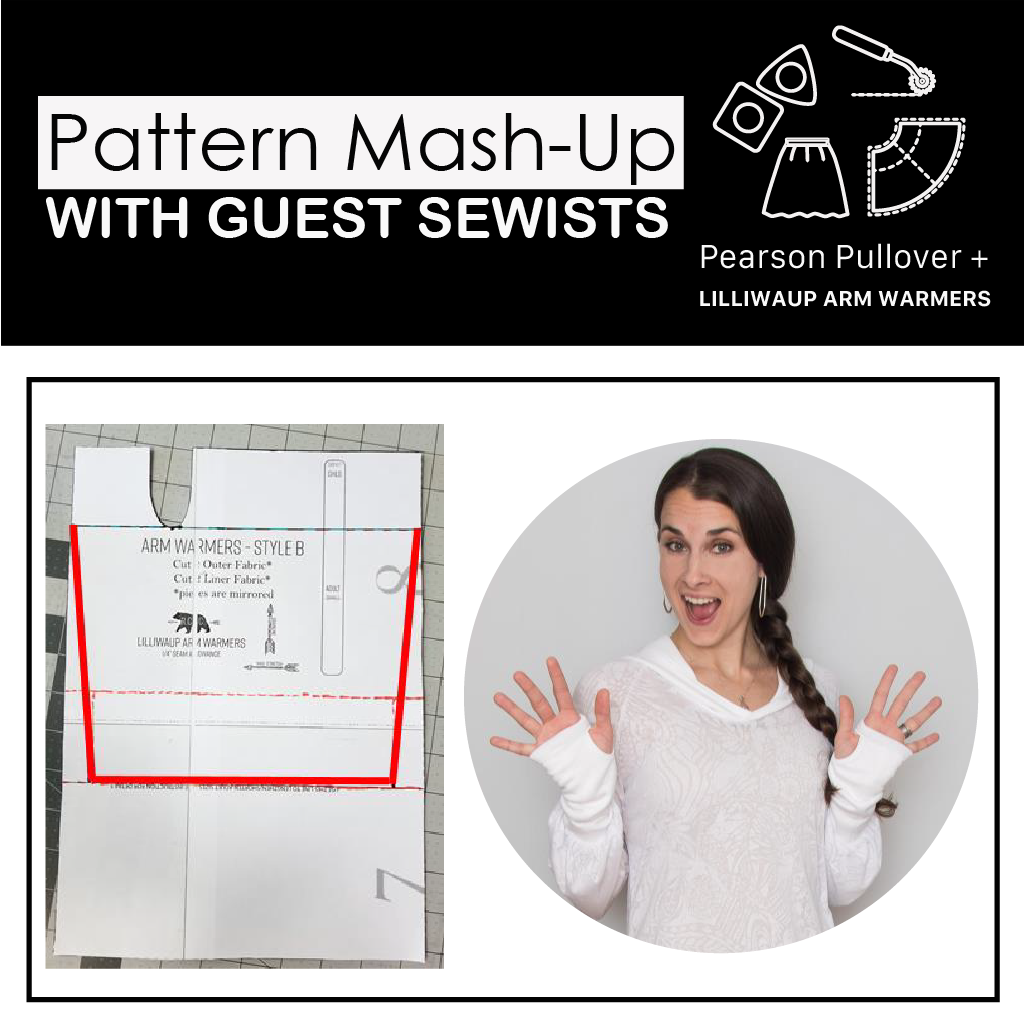
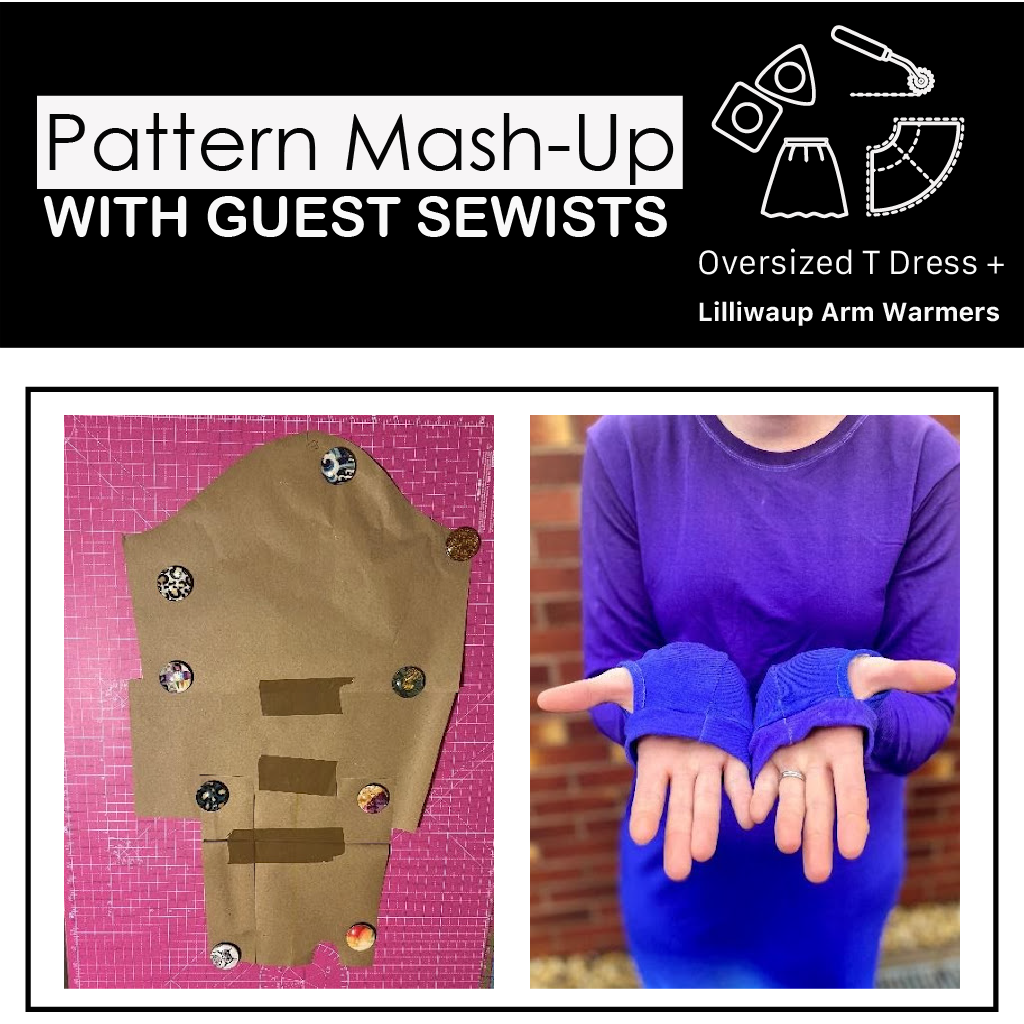
First, cut your Pearson wristband in half lengthwise. Why, you ask? Because the wristband pattern is made to be folded in half during construction, so cutting it in half gets us closer to its finished measurement, which we need to absorb into the modified arm warmer pattern.


Next, we’ll need that thumb-to-wrist-bone measurement (plus seam allowances) that we took above. Mine was 4.25”. Lay the Pearson wristband pattern (that we just cut in half) on top of the Lilliwaup arm warmer pattern so that the top of the wristband is spaced below the thumbhole of the arm warmer by a distance equal to your thumb-to-wrist-bone (plus seam allowances) measurement.

Be sure your wristband pattern is centered (left-to-right) on your arm warmer pattern. Trace the outside of your wristband pattern onto your arm warmer pattern.

Finally, connect the left and right ends of the horizontal line you just drew down to the left and right ends of the bottom of the wristband outline.

Your modified Lilliwaup Arm Warmer pattern is now a custom thumb cuff for the Pearson Pullover! Cut that puppy out, and let’s get sewing!

To construct your new thumb cuffs, you will need to cut 4 arm warmers (2 mirrored pairs) using your modified pattern and 2 hand bands using the Lilliwaup pattern. I recommend using the same fabric for both the outer and lining of the arm warmer, because this will make orienting the finished cuffs with the sleeves MUCH less complicated later on. It’s best to use a fabric with good recovery on the arm warmers and hand bands, like cotton lycra (CL) or rib.

Follow the Lilliwaup instructions for Style B until just before attaching the arm band. In other words, you’ll end up with two complete, lined thumb cuffs, with finished top edges and raw bottom edges.
Next, construct your Pearson Pullover using the options of your choice. You will follow the Pearson instructions exactly, with the exception of the wristbands/wrist elastic. For now, leave the wrist of your Pearson sleeves unfinished.

You’ll notice that the bottom of the sleeve is much wider than your thumb cuff. This is what gives the Pearson that great, full sleeve! Because your cuff is likely not stretchy enough to fit the sleeve without causing it to bunch unevenly, you will probably need to gather the raw edge of the sleeve to fit your cuff.

Next, make sure that your thumb cuff are oriented so that they mirror each other. The center seam should fall on the palm side of each, so that there will be no visible seams along your knuckles. You may need to flip one inside out in order to get a mirrored pair.

It’s time to sew the thumb cuffs onto your sleeve! Turn one thumb cuff upside down relative to the sleeve, keeping two important things in mind:
1. Align the inseam of your sleeve with the thumb hole of the thumb cuff.
2. Be sure that the vertical (palm) seam of the thumb cuff is oriented toward the back side of the sleeve and shirt. If it is not, use the other thumb cuff instead. This is why it’s important to start with a mirrored pair of thumb cuff. How do I know? My first version had one backward cuff. Doh!

With right sides together, slide one sleeve into one thumb cuff and pull it through so that the raw edge of the gathered sleeve lines up with the raw edge of the thumb cuff. Pin/clip in place, making sure that the gathers are spread evenly, and double check the orientation one more time before sewing!

Repeat with the other thumb cuff, again making sure everything is oriented correctly before sewing. If it’s not, don’t panic! Just flip your arm warmer inside out and try again. That’s why we used the same fabric inside and out, remember?

SQUEEEEE, you’re finished!! Now go out and wear that new shirt like a BOSS.


