


Rompers are trending right now. Everyone seems to be all about that romper.
Well I'm going to show you how to take that old shirt and turn it into a fun romper for a child.
The romper I'm making is from an XL men's collared shirt and it's going to be for my twins.
Required Tool + Materials:
Shirt
1/2" Wide Elastic
3/8" Wide Elastic
Extra Fabric for the Liner
Pins/Clips
Safety Pin
Sewing Machine + Needle + Thread
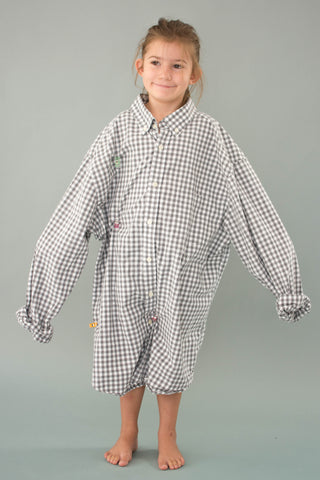
Here's Penny in the shirt and what I've done is put a clip a few inches below here crotch (about 3) and also clipped under her arm, at her waist, and her thigh.

(Shirt clipped about 3" below the crotch.)

(Shirt clipped below the armpit and at the waist.)

You're going to cut the shirt off at your armpit mark and you're also going to cut the sides of the shirt open. Follow the sleeve to taper the romper in towards the top.
For the crotch cut a U shape opening up to the clip.

So with your shirt cut up try to get the strap pieces cut out using the sleeves. I made my straps 2" X 10".
The straps are folded like double fold bias tape and then sewn.
You're going to want a liner piece for the top of your romper.
Start with a cut that is the width of the front and back of your romper and the length should be the length of the top of the romper right up to wear it tapers out.
You can make it longer but make sure your liner tapers the same as the romper does because the liner will be sewn to the romper you want them to match.

Using a straight stitch sew the button placket closed.

Lay the front and back of the romper right sides together and sew down each side and the crotch.

Make the casing for the elastic by folding the leg up towards the wrong side 1".

Secure the raw edge (I used a serger) and create the casing for the elastic.
Sew a row of stitches 3/8" from the fold.
Then sew another row of stitches 1/2" away from that row. Leave a 1"-2" opening to thread the elastic in.
I make my elastic the width around her thigh.
After I sew the two ends together that's usually enough negative ease to be comfortable for her.
Thread the elastic in and sew the ends together.
I suggest after threading the elastic in have your little try the romper on to make sure the elastic is comfy before closing your hole.
Oh, and also make sure you haven't twisted the elastic in the casing.

Once you got the elastic fitting well close the hole.

Next, sew the liner into a loop. Sew one side to secure the raw edge.
Insert the liner over the top of the romper, right sides together. Sew them together using a straight stitch.
Then flip the liner to the inside of the romper.

Create the casing for the 1/2" elastic. Start by sewing a row of stitches 3/8" away from the seam.
Then move 1" down and sew another row of stitches, leave a 1"-2" opening.
For the 1/2" elastic I make it the chest width. I've found that once I sew the ends together that's enough negative ease for a comfy fit.
Thread the elastic in and make sure the elastic hasn't twisted in the casing then sew the ends together.

Have your little try it on to make sure it's comfy.
Once you get it comfy close the hole.
The next step is to sew a row of stitches 1" away from the secured edge (the edge I serged) of the liner.
Then move 1/2" down and sew another row of stitches leaving 1"-2" open for threading the 3/8" elastic in.
I cut this elastic the same width as the 1/2". Thread the elastic in and sew the ends together.
Have your little try it on, make sure the elastic hasn't twisted and then once it's perfect, sew the hole close.
Now all you need to do is make the straps.
You're going to fold them like bias tape (if you need a little help with this check out this tutorial) and sew.

OMG you're almost done. Isn't this so rad?
Okay, next all you need to do is position the straps and sew them on. If your model is handy just put that romper on and pin the straps in place.
If your model isn't handy check out this tutorial on strap position, also it shows you how I like to sew them on.
I like to sew the strap in the seam lines for the 1/2" casing but you do you. And don't get tied down into having to make 4 straps that tie at the shoulder.
Get creative!
Do two straps that tie behind the neck, or 4 straps that cross. Like, totally make it your's because you can do whatever you want, it's your creation.

